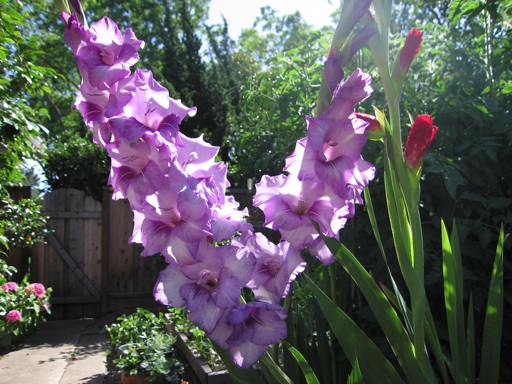
The gladiolas I’ve planted in the ground in past years have been hit or miss. This year, I bought a few small purple gladiola bulbs from a nursery and planted them in one of our raised beds, which is amended with compost and gets watered every other day. They seem to love it there. The flowers look perfect today when I took this picture. Gladiola flowers are beautiful when they are in bloom, but unfortunately, each plant only blooms for about a week.
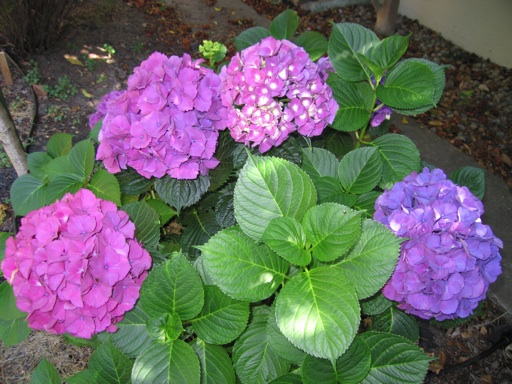
We have 7 hydrangea plants, but the hydrangea shown in this picture is growing better than the others and has the most flowers. It’s growing under our yellow peach tree and only gets a little filtered sun for a few hours a day in that spot. One of our older hydrangeas is getting sun all day. That plant often looks wilted and the leaves tend to get sunburned. We have added aluminum sulfate around the roots of the hydrangea in this picture for the past few years. Aluminum sulfate is supposed to turn hydrangea flowers blue. Its flowers used to be light pink and now they are more purple, but they are still no where near being blue.
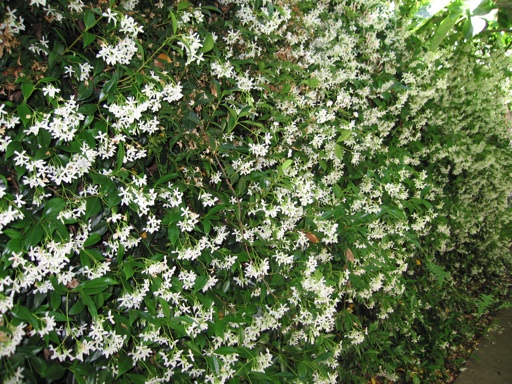
The white star jasmine that is growing up one of our backyard fences is in bloom now. Its flowers have a wonderful summertime fragrance. We often open the bedroom windows next to the jasmine to let the fragrance come into the house.
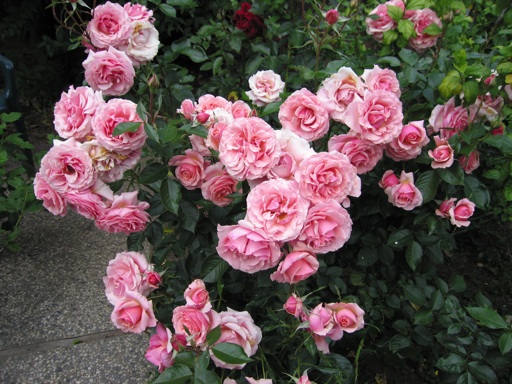
This picture shows one of our pink roses. It was at its peak bloom about a month ago when this picture was taken. I love this particular rose, because its flowers last so long. The flowers just started to fade a few weeks ago. Many roses open and drop their petals in about a week or less. But these flowers hold their petals for weeks without dropping them. In fact, the flower petals stay on for so long that they start to turn brown on the plant before they fall off. I don’t know what variety of rose it is, because it was planted by the previous owners and there’s no tag on it.
June 26 2010 | Gladiolas and Hydrangeas and Jasmine and Roses | Comments Off on Flower Gallery 2010
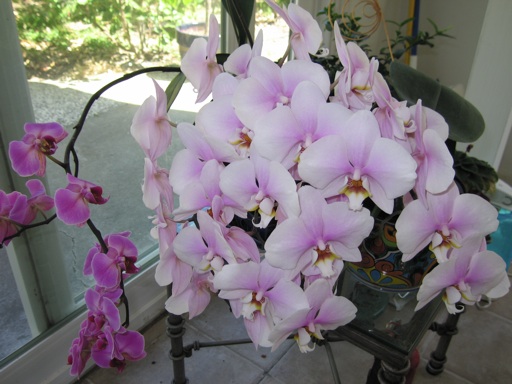
We have owned the two orchid plants in this picture for about 2-3 years now, and we have managed to get them to re-bloom again and again. Our current method involves filling a large plastic tub with about 7-8 inches of water, and then adding bloom and growth orchid fertilizers to it (1 TSP each). We soak all of our orchids in the bath for about 15-30 minutes every two weeks. We no longer water them in the kitchen sink because we have 4 orchids now, and they don’t fit in the sink.
They seem to love this watering and fertilizing technique. As soon as we cut back the old flower stems, they start growing new ones. The 2 larger plants never seem to be without flower stems. The purple orchid in this picture has two flower stems, and the white orchid in this picture has several smaller flower stems branching off of one larger stem.
Although one of our smaller orchids has not bloomed in about a year. I suspect that’s because it’s growing in moss which seems to be perpetually moist. Our larger orchids are growing in bark, which dries out much faster. We probably need to transplant this orchid into a larger pot with bark.
June 20 2010 | Orchids | Comments Off on Orchids Are Back Again
In March, we added two more raised beds in our backyard. We now have four raised beds that we are growing vegetables in. This year, we are growing tomatoes, potatoes, pole beans, peppers, eggplants, onions, basil, strawberries, cilantro, corn, zucchini, carrots, and cucumbers in our four raised beds. Although we haven’t harvested any vegetables yet, some of our vegetable plants are growing better than others.
Last October, I harvested seeds from dried up bean pods on our pole bean plants. I stored those seeds in a plastic bag over the winter and then planted the seeds in mid-March. Below is a picture of our pole beans today. In nearly 3 months, they have completely covered the fence I built for them last year.
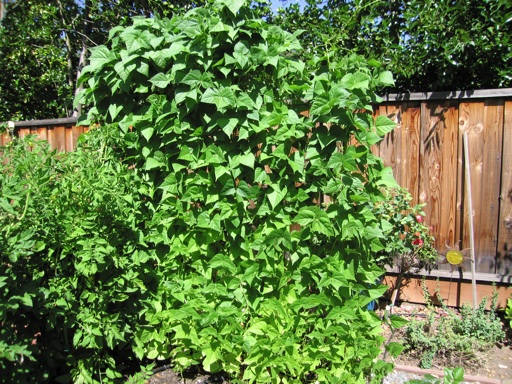
In my experience, pole beans have been really easy to grow by seed and very prolific producers. Nearly all of the seeds sprout without any stratification. And once the beans sprout, they grow quickly with minimal care and little or no fertilizer (at least in our soil which is amended with compost). Although snails and slugs will eat them if they are not protected somehow. Every year that we have grown pole beans (for about the past 4 years), they have produced more beans than we could eat.
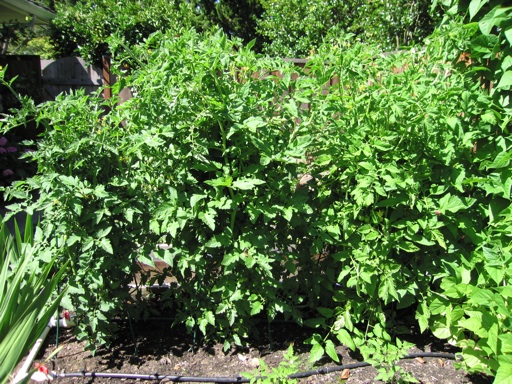
Another plant we have had a lot of luck growing is tomatoes. We planted three tomato transplants (early girl, big beef, and champion) in March that we bought from a local nursery. They were about 4 inches tall at the time. They have grown very quickly over the past 3 months, even though the weather here has been much wetter and cooler than average. As shown in the next picture, they have already grown to completely fill their cages.
We also planted San Marzano tomatoes by seed indoors a few months ago. Growing tomatoes by seed is a first for us. Nearly, all of the tomato seeds sprouted, but as soon as I transplanted the first batch of seedlings outside in early May, they died. The remaining batches of tomato seedlings I “hardened off” by gradually exposing them to direct sunlight and the outside temperature a few hours a day. After hardening off for about 2 weeks, I planted the remainder of the seedlings outside in our new raised beds. The tomato seedlings I hardened off survived and are looking better, although they are only about 6 inches high now.
Of course, one of the advantages of growing plants by seed is access to a larger number of varieties, many of which are not easy to find as transplants. San Marzano tomatoes are supposed to be great sauce tomatoes. The next pictures shows the two new raised beds we just added in our yard. The San Marzano tomatoes are growing on the left side of the bed in the foreground.
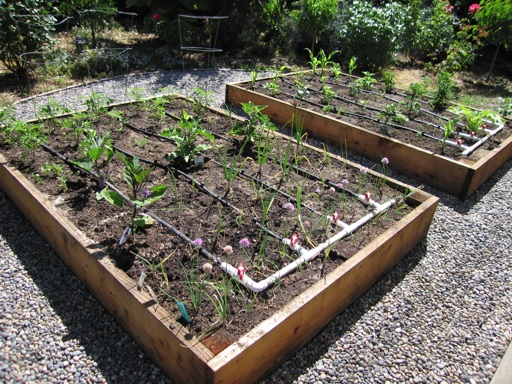
Some of the plants that we haven’t had much luck with this year are onions and leeks. I planted white onion sets, shallot sets, and leek transplants in one of our raised beds in March. The onions and leeks are growing on the right side of the bed in the foreground in the above picture. Although the onions and shallots sprouted, they haven’t grown much, and many of their leaves are turning yellow. The leeks haven’t grown at all since I planted them. I don’t have any idea why they haven’t grown well. But I tend to think that part of the fun of growing is taking a chance on growing new plants and that often means some of those plants don’t end up growing well.
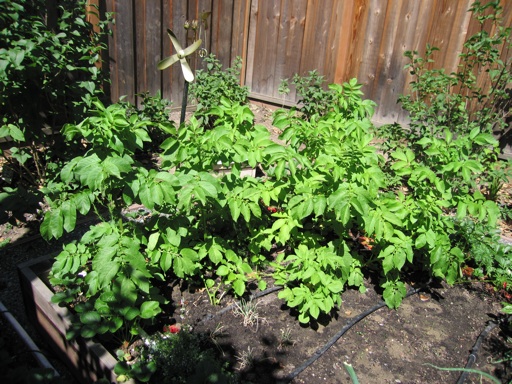
Potatoes are another new plant we added to our garden this year. I planted yukon gold potatoes, which I ordered online as potato sets. I also planted white potato sets, which I purchased from a local nursery. The yukon gold potatoes look wonderful. They have already grown to about two feet tall and have really filled in the space around them (see picture below). The white potatoes sprouted, but they didn’t grow nearly as much as the yukon gold potatoes, so I ended up removing most of the white potatoes to make room for other plants.
June 13 2010 | Beans and Onions and Potatoes and Tomatoes | Comments Off on Vegetable Garden Successes and Misses
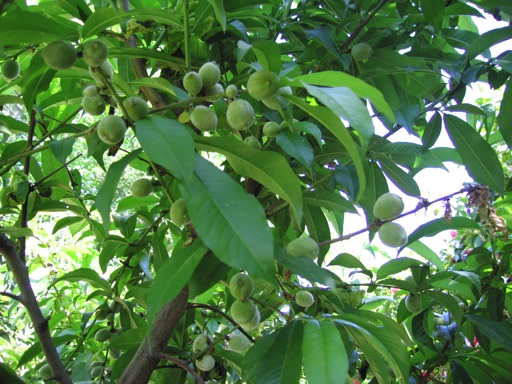
Today, I spent about an hour picking many of the newly forming peaches off of our 8-year old O’Henry peach tree. The tree probably set over 200 peaches. I think I picked about half of them off. Last year, I didn’t need to thin nearly as much, because I pruned the tree so heavily the previous winter, and the tree set about 40 large peaches that grew to grocery store size. This year, I didn’t prune nearly enough to prevent a heavy fruit set.
Two years ago, I didn’t thin much, and I waited too long to do it (in July). The tree ripened nearly 200 peaches that year, and they were small, only about half the size of grocery store peaches. Our tree isn’t large enough to ripen more than about 70 large peaches, so I plan on thinning again in a few weeks.
Peaches have a tendency to produce too much fruit. A large crop of peaches can cause the branches to sag and break off as the fruits get larger. Pruning and thinning greatly reduce the weight on the branches. Thinning and pruning also allow the tree to produce larger fruits. I’d rather have a smaller number of large peaches, than many small peaches. Although I realize that thinning is beneficial for these reasons, I still hate doing it. I feel like I am wasting good food.
Peaches form on the many small thin branches that grew during the previous year. Most of these branches can only support a few peaches. Today, I thinned to about 1-3 peaches per branch, trying to space them apart by at least 4-6 inches, per advice I read in different gardening publications. The photo above was taken before I started thinning.
I have learned through experience that thinning needs to be done early in the season, and mid-spring is the time to do it. When I waited until summer to thin in 2008 about 5 weeks before harvest, the peaches I left on the tree after thinning did not grow any larger. Although thinning always reduces the load on sagging branches.
May 02 2010 | Peaches/Nectarines | Comments Off on Thinning Peaches
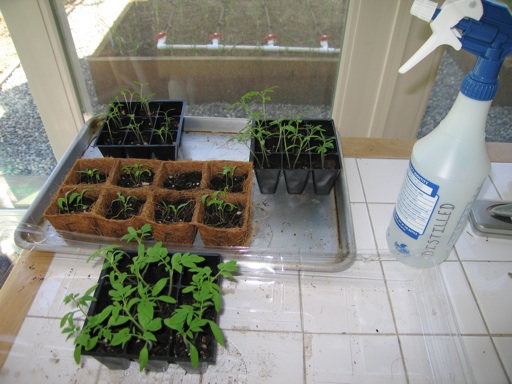
Last month, we planted several types of annual vegetables by seed indoors in containers. We planted corn, eggplant, tomato, habanero pepper, cantaloupe, and cucumber seeds. We have been watering the indoor seedlings by spraying them with distilled water in a spray bottle. Seedlings don’t need much water, and the spray bottle avoids overwatering and having to drain out excess water.
Most of the seeds we planted sprouted and grew well while they were indoors. However, as soon as we planted them outside in our raised beds, they started to have problems. Most of the tomato, cucumber, cantaloupe, and pepper seedlings that we transplanted outside a few weeks ago have died already, and the leaves of the corn seedlings are turning yellow.
I think that the problem lies with the seedlings not adjusting well to the sudden change in climate conditions from indoors to outdoors. The last few weeks our weather has been very changeable from warm sunny dry days and cool nights to cool rainy days like today, which is a big change from our stable indoor conditions. Several of the seedlings I transplanted outside during a dry sunny spell soon started to turn white as if they were getting sun burned, even though I was watering them every other day. Our low temperatures have not been dipping below about 45 degrees F, so I don’t think it was exposure to cold, although that could have been a factor as well.
I decided to do some research online, and I came across this website on hardening off transplanted seedlings from Washington State University. This website has some good pointers about gradually exposing your seedlings to strong direct sun and cold temperatures for a few hours a day. We still have some tomato and eggplant seedlings that I have not transplanted outside yet (see picture above). I intend to try gradually exposing our remaining seedlings to the sun and colder nights.
This website has some good suggestions, but I don’t agree with all of the advice on this site. One of the issues I have with the site’s advice is the minimum recommended temperatures for tomato, cucumber, and muskmelon (i.e., cantaloupe), which are 65, 60, and 60 degrees, respectively. In March, I planted 3 tomato transplants I bought from a nursery in one of our outdoor raised beds, and they are all growing rapidly even though the low temperatures here have consistently been below 50 degrees. In fact, we rarely have low temperatures above 60 degrees even in the summertime, and yet our tomato plants have thrived here in past years.
I had some left over cucumber and cantaloupe seeds. So last week, I planted them directly in our outdoor raised beds where the seedling transplants from indoors had just died. Those seeds have already sprouted despite the relatively cool temperatures. Most of these seedlings look great. None of them are looking sunburned or yellow even after a few warm sunny days last weekend. However, some of these new cucumber seedlings look like they have been picked at by birds or possibly eaten by snails, so I covered the bed with two layers of bird netting. I used this technique last year after the birds ate my first set of outdoor cantaloupe seedlings, and it worked to protect the second set of seedlings.
April 28 2010 | Vegetables | Comments Off on Growing Vegetables by Seed
« Prev - Next »


